The purpose of this document is to assist you with the installation of your Hub, guide you through each step of setting it up along with other crucial components, and have it associated with your trailer under your company’s profile. Once you have received your kit from Level 5 Fleet, please go through the list of items to find the following equipment:
- 1 hub
- 1 boot
- 1 power supply cable
- 2 Velcro strip pairs
- 1 half-inch NPT male-to-male adapter
- 1 half-inch NPT male-to-female adapter
- 1 cleaning cloth
- 3 cable ties
Reconcile the list with the image below and get familiarized with the hardware. A legend is also provided to aid with important information such as ports and connectors for the hub and cables.
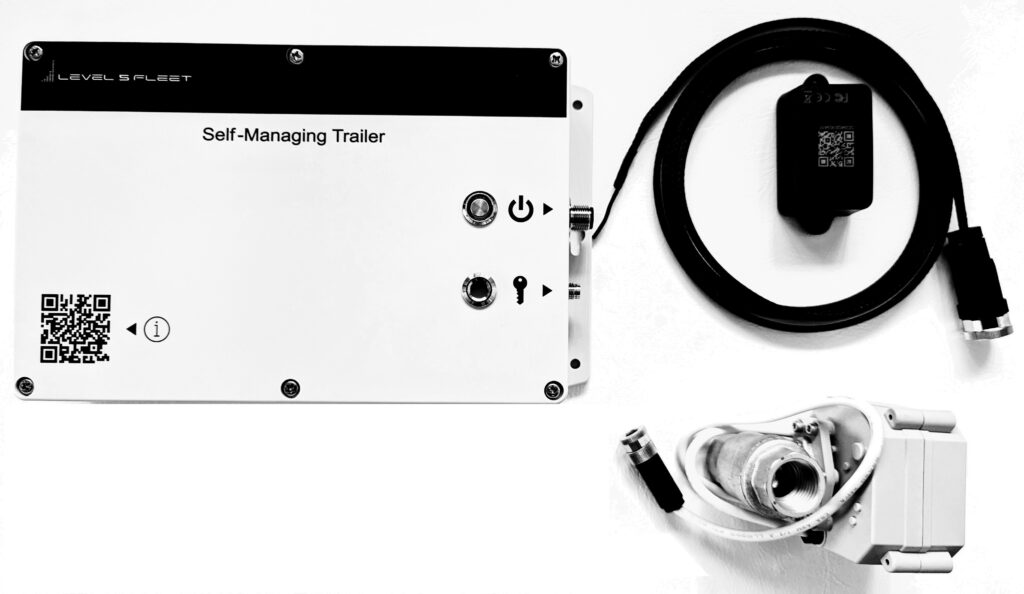
- Hub
- QR link to Provisioning Center
- Hub ID location
- LED (reserved)
- Hub connector for Boot
- Boot cable
- Half-inch NPT valve connector
- Boot
- Power supply connector
- Power supply cable
- Universal trailer fob
- Fob ID location
- Hub power connector
- Power button
- Tractor power LED indicator
Trailer Installation
Now that all the equipment in the kit has been deemed complete and present, you can now proceed to install the Hub on the trailer. Follow the steps below to securely set up the Hub:
- Select a suitable Hub installation point close to the nose box. The power supply cable is fairly long at 6 feet. Correctly identify the AUX and GND cables of the power supply, which are red and black in color, respectively. Connect the power supply cables to the trailer’s 7-pin J560 socket.
- Remove the protective film from one side of the Velcro strips and firmly press them on the left and right sides at the back of the Hub. Similarly, remove the protective film from the other side and firmly press the Hub on a clean and level surface in the front of the trailer, preferably close to the nose box.
- Once the Hub has been firmly secured, connect the power supply connector (9 in the Legend above) to the Hub connector (13). The cable ties can be used to secure the cable as necessary without straining any connection points.
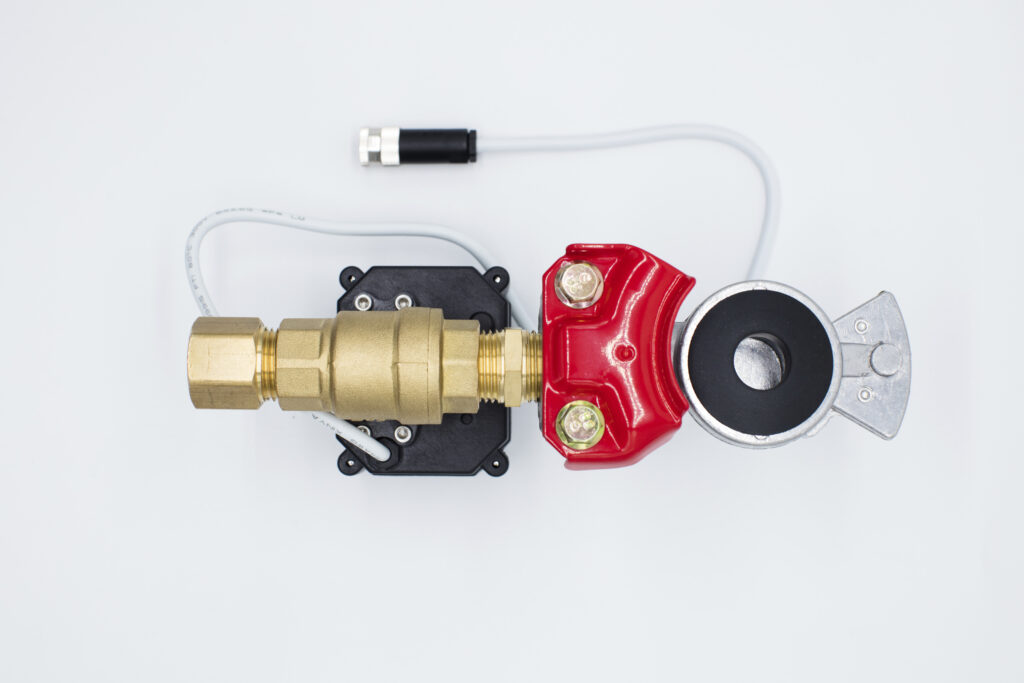
- Remove the red gladhand from the trailer and connect the Boot (8) to the emergency line where the gladhand is originally located. Make use of the supplied adapters if required to fit your trailer connector.
- Install the gladhand on to the Boot valve connector (7), the assembly should look something like the picture below.
- Proceed to connect the Boot cable (6) to the Hub connector (5). After connecting the cable, press the power button (14) which should always remain on. Turn it off only when storing the Hub. Take note that the LED (15) lights up when the tractor is connected.
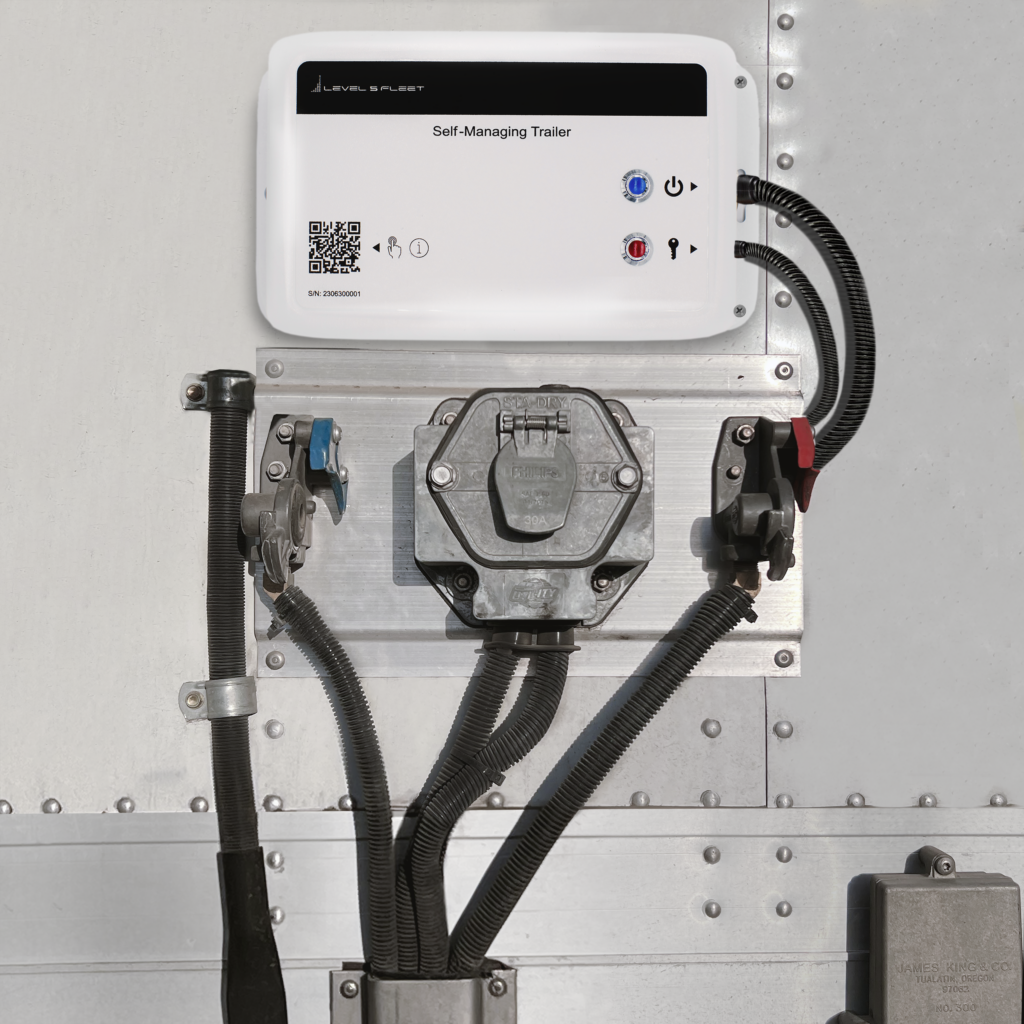
If everything has been followed and connected, the successful installation should look similar to the picture below.
Hub Provisioning
This part is the post-installation process where the Hub is associated to the trailer on the Admiral Console via the provisioning center. The console is a web application comprising of a simple dashboard where the provisioning process is completed and providing features like security management, creating a company profile, and managing an entire fleet of trailers.
To complete the provisioning process, scan the QR code on your Hub using your phone or tablet, which will open the provisioning center. In case the page does load automatically, follow the link that pops up on your camera app when attempting to scan. On the bottom of the page that is displayed to you, is the Provision button – go ahead and click on it which will lead you to the form as shown below.
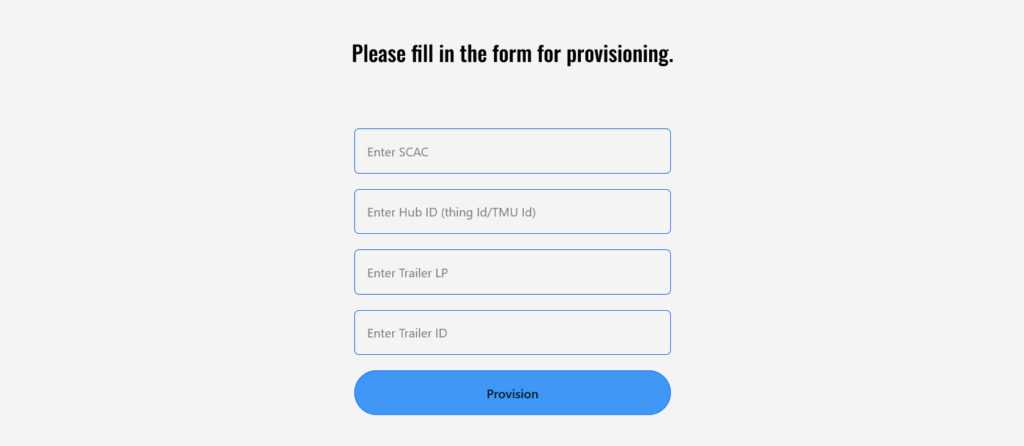
Fill in the requested details. In case of the Standard Carrier Alpha Code (SCAC), you may fill in a 5-letter abbreviation of your company. After all the details have been filled in, click on the Provision button which will redirect you to the Admiral Console.
Leave a Reply